Buildbot的搭建总结

PlatForm win32 64bit python version python2.7 32bit

入门

如果是Linux系统的FirstRun,可以按照官方这个步骤去做。官方说Windows也差不多,但在我的环境下有问题,(我安装了Cygwin,在Cygwin环境下运行的)。 virtualenv 这个的easy_install太旧了。我用sandbox运行 easy_install buildbot总是提示缺少库。更新easy_install 也没用。 关于用easy_install -U setuptool的产生的Perssion Denied问题可以看这里

Windows 下的安装步骤。参考这里 下面说一下我遇到的问题。 我的建议是都安装x86的版本。python PyWin32版本。 有一些需要编译的python库很麻烦如pysqlite 。python2.7的大部分库是用VS2008编译的,可以去下个VS2008的Express。如果是Windows 64bit出现问题参考这里 因为我装了好几个版本的VS。我的问题弄了好久没解决。还好网上有编译好的版本。 http://www.lfd.uci.edu/~gohlke/pythonlibs/#pywin32 我在这里下了个pysqlite的exe. 如果下载的是.zip文件,则解压,然后dos进入该目录,执行python setup.py install命令即可 也在网上找了个OpenSSL windwos版的下载安装好了。 大部分需要的组件我都上传的网盘了地址http://pan.baidu.com/s/1dD7tlUp 检查是否buildbot和buildbot-slave是否安装好了。

1
2
buildbot --version
buildslave --version

如果一切正常那可以按照FirstRun 这里后面的继续去做了。

Creating a master

At the terminal, type:

buildbot create-master master mv master/master.cfg.sample master/master.cfg Now start it:

1
2
buildbot start master
tail -f master/twistd.log

You will now see all of the log information from the master in this terminal. You should see lines like this:

1
2
3
4
5
6
7
8
9
10
2011-12-04 10:04:40-0600 [-] Starting factory <buildbot.status.web.baseweb.RotateLogSite instance at 0x2e36638>
2011-12-04 10:04:40-0600 [-] Setting up http.log rotating 10 files of 10000000 bytes each
2011-12-04 10:04:40-0600 [-] WebStatus using (/home/dustin/tmp/buildbot/master/public_html)
2011-12-04 10:04:40-0600 [-] removing 0 old schedulers, updating 0, and adding 1
2011-12-04 10:04:40-0600 [-] adding 1 new changesources, removing 0
2011-12-04 10:04:40-0600 [-] gitpoller: using workdir '/home/dustin/tmp/buildbot/master/gitpoller-workdir'
2011-12-04 10:04:40-0600 [-] gitpoller: initializing working dir from git://github.com/buildbot/pyflakes.git
2011-12-04 10:04:40-0600 [-] configuration update complete
2011-12-04 10:04:41-0600 [-] gitpoller: checking out master
2011-12-04 10:04:41-0600 [-] gitpoller: finished initializing working dir from git://github.com/buildbot/pyflakes.git at rev 1a4af6ec1dbb724b884ea14f439b272f30439e4d

Creating a slave

Open a new terminal and enter the same sandbox you created before:

1
2
3
4
cd
cd tmp/buildbot
source sandbox/bin/activate
Install the buildslave command:

easy_install buildbot-slave Now, create the slave:

1
buildslave create-slave slave localhost:9989 example-slave pass

The user:host pair, username, and password should be the same as the ones in master.cfg; verify this is the case by looking at the section for c[‘slaves’] and c[‘slavePortnum’]:

1
cat master/master.cfg

Now, start the slave:

buildslave start slave Check the slave’s log:

1
tail -f slave/twistd.log

You should see lines like the following at the end of the worker log:

1
2
3
4
5
6
7
8
9
2009-07-29 20:59:18+0200 [Broker,client] message from master: attached
2009-07-29 20:59:18+0200 [Broker,client] SlaveBuilder.remote_print(buildbot-full): message from master: attached
2009-07-29 20:59:18+0200 [Broker,client] sending application-level keepalives every 600 seconds
Meanwhile, in the other terminal, in the master log, if you tail the log you should see lines like this:

2011-03-13 18:46:58-0700 [Broker,1,127.0.0.1] slave 'example-slave' attaching from IPv4Address(TCP, '127.0.0.1', 41306)
2011-03-13 18:46:58-0700 [Broker,1,127.0.0.1] Got slaveinfo from 'example-slave'
2011-03-13 18:46:58-0700 [Broker,1,127.0.0.1] bot attached
2011-03-13 18:46:58-0700 [Broker,1,127.0.0.1] Buildslave example-slave attached to runtests

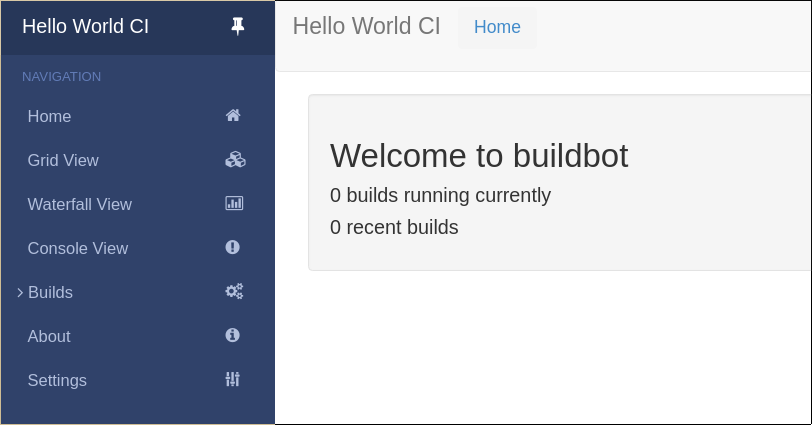
You should now be able to go to http://localhost:8010, where you will see a web page similar to:

Click on the Waterfall Display link and you get this:

Comments